


How to Give Your Bathroom a Makeover on a Budget
Q&A with Organizational Pro Peter Walsh + Dermatologist Shares A…

Actor Hank Azaria + Freezer Meals + Artichokes 2 Ways with Rach

See Inside Barbara Corcoran's Stunning NY Apartment + It's Steak…

The Best Moments From 17 Seasons of the Show Will Make You Laugh…
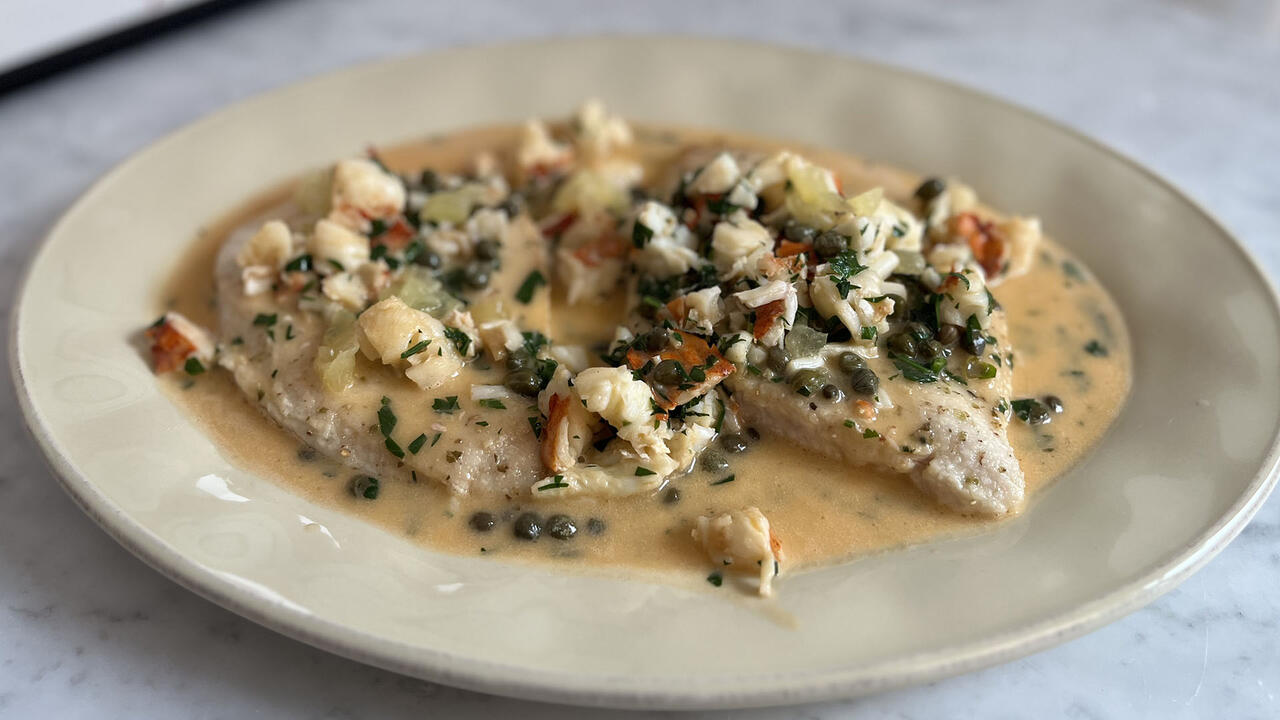
How to Make Chicken and Lobster Piccata | Richard Blais

Donnie Wahlberg Spills Details About NKOTB's First Ever Conventi…
Donnie Wahlberg + Jenny McCarthy Say Rach Is Such a "Joy" + Look…

How to Make Crabby Carbonara | Rachael Ray
Rach Chats "Firsts" In Flashback From Our First Episode Ever In …

How to Make Tortilla with Potatoes, Piquillo Peppers and Mancheg…

How to Make Sesame Cookies | Buddy Valastro
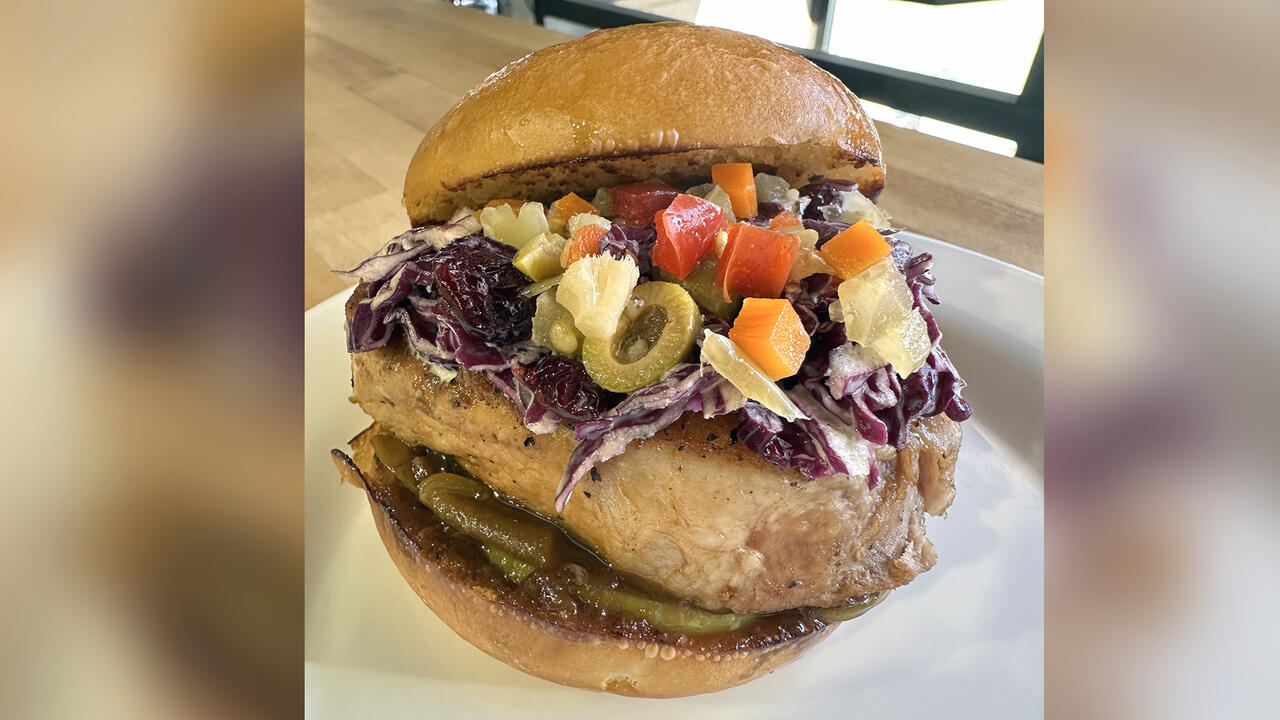
How to Make Apple-Cider Braised Pork Chop Sandwiches with Onion …

Rach's Chef Pals Say Goodbye to Show in Surprise Video Message

Celebrity Guests Send Farewell Messages After 17 Seasons of the …

Andrew McCarthy Teases Upcoming "Brat Pack" Reunion Special
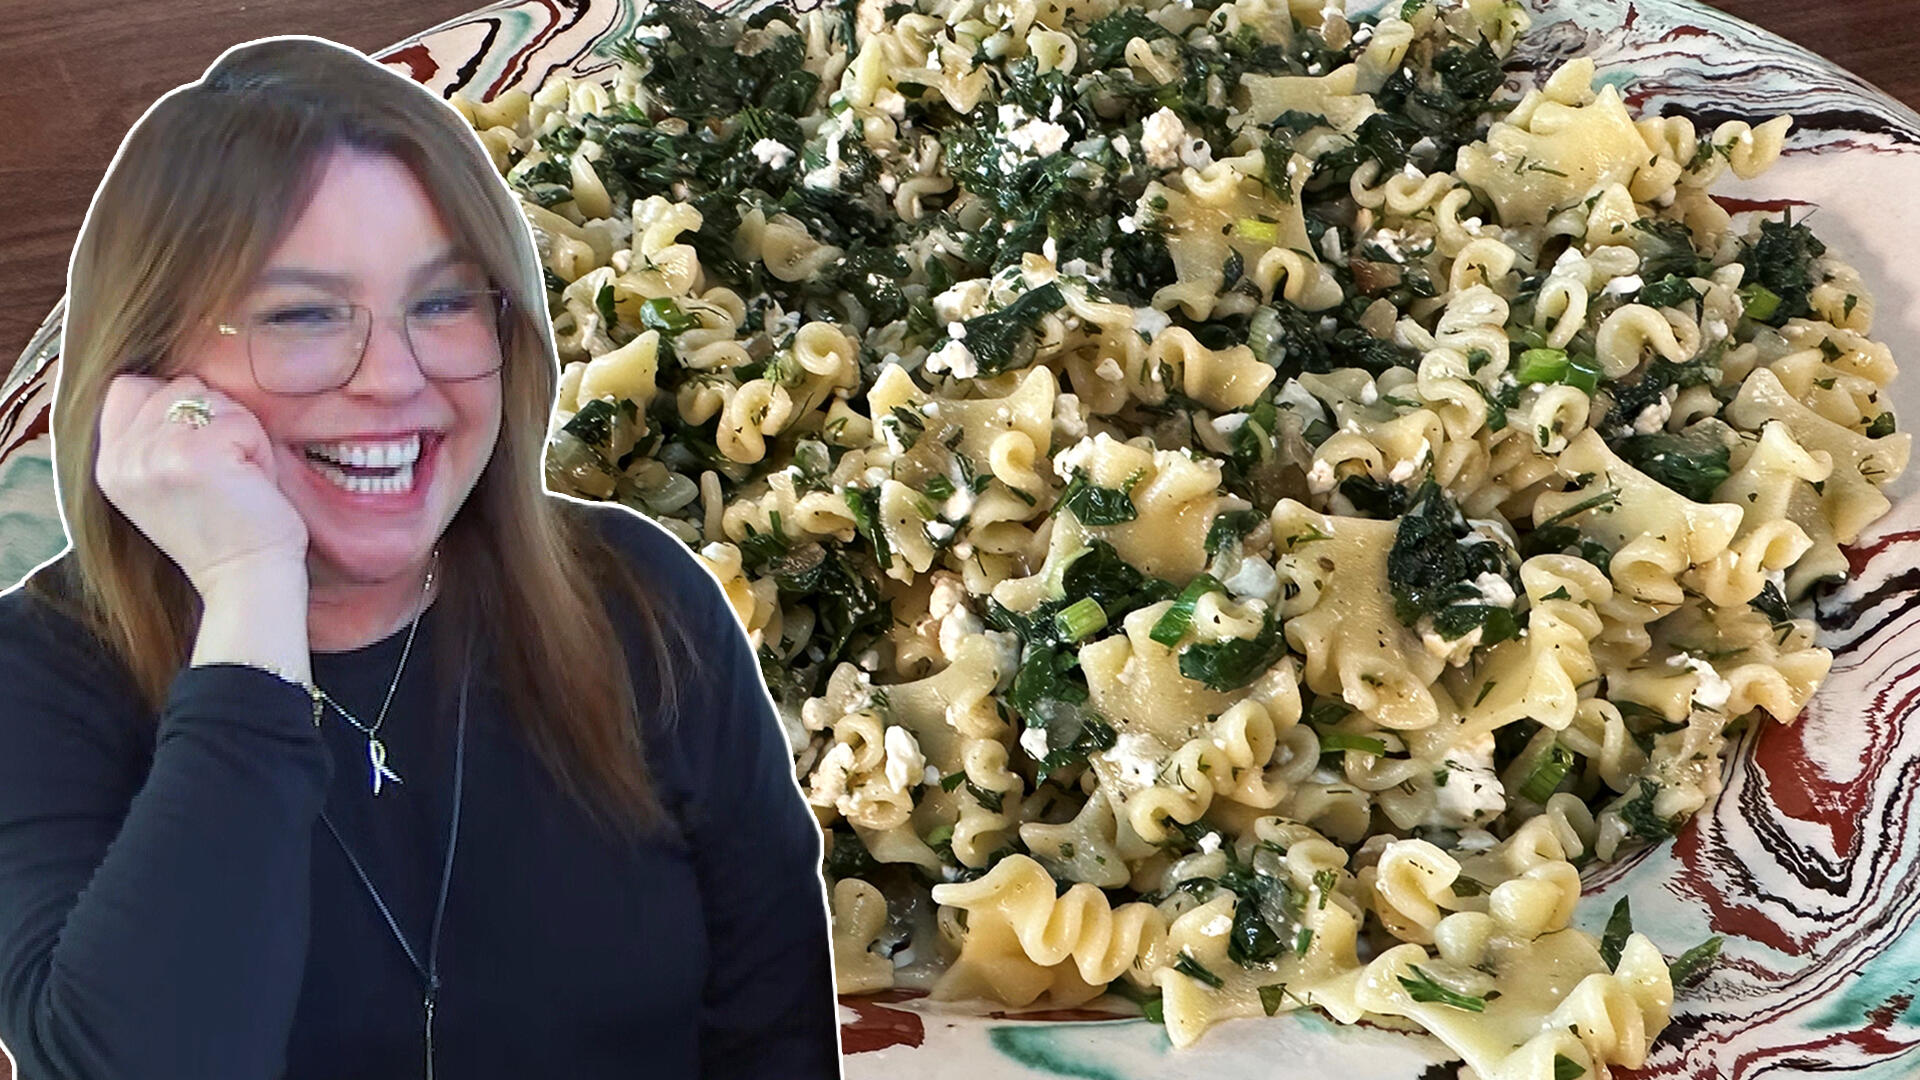
How to Make Spanakopipasta | Rachael Ray
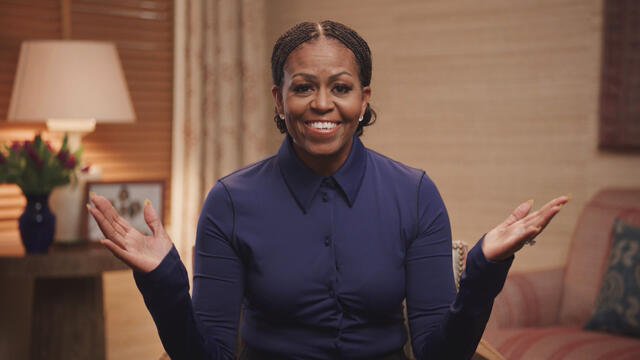
Michelle Obama Toasts Rach's 17 Years on the Air With a Heartfel…

How to Make Shrimp Burgers | Jacques Pepin

Andrew McCarthy Chokes Up Discussing Emotional Trip to Spain wit…

Celebrity Guests Send Farewell Messages After 17 Seasons of the …
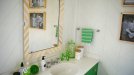
Charlotte Smith, the Connecticut-based DIY blogger behind At Charlotte's House is a mom of five and winner of Rachael’s first-ever "Viewer Tip-Off" (The ideas that won her this title? These cheap + easy DIY projects that actually look like a million bucks).
“My design style is fun frugal repurposed eclectic….I'm fixing up our 100 year old house and artfully hoarding armchairs in the garage. I love color. I love flea markets. I love a little mess. My days are spent writing, painting, sanding, laughing and negotiating with our 5 kids,” she says.
When we saw the latest bathroom makeover she did in her home and found out she did it all for only $60 (!!), we asked her to come back and share her budget-stretching tips!
While Charlotte focused on her daughter’s all-white bathroom, these design-savvy tips would work for any room that needs a fresh look. Here’s how she pulled off this chic and modern update.
Step 1: Utilize leftover paint from other projects to add a pop of color to a room
Charlotte repainted the bathroom vanity a light green, setting the tone for the new look of the room. And because a bathroom is typically a smaller room, she had enough leftover paint from another project to give a fresh coat to the walls, too.
Step 2: Buy a large mirror and DIY the frame with this FREE material
Charlotte purchased a $10 mirror with a very basic frame and then transformed it with this genius DIY project using wooden paint stirs, which are — that’s right — free! “You just have to give them a big smile and they’ll give you a handful!” Charlotte says.
She cut them into pieces of the same size, staining half pale white and leaving the others au natural. Together, the contrasting pieces create a Chevron pattern when they’re glued onto the frame — which is just SO chic! (Charlotte’s tip: For a smaller mirror, a glue gun works just fine. For a larger mirror, you might want to use a stronger adhesive, like liquid nails.)
Watch her demonstrate in the video below!
How to DIY a Mirror Frame With FREE Material
How to DIY a Mirror Frame With FREE Material
Q&A with Organizational Pro Peter Walsh + Dermatologist Shares A…
Actor Hank Azaria + Freezer Meals + Artichokes 2 Ways with Rach
See Inside Barbara Corcoran's Stunning NY Apartment + It's Steak…
The Best Moments From 17 Seasons of the Show Will Make You Laugh…
How to Make Chicken and Lobster Piccata | Richard Blais
Donnie Wahlberg Spills Details About NKOTB's First Ever Conventi…
Donnie Wahlberg + Jenny McCarthy Say Rach Is Such a "Joy" + Look…
How to Make Crabby Carbonara | Rachael Ray
Rach Chats "Firsts" In Flashback From Our First Episode Ever In …
How to Make Tortilla with Potatoes, Piquillo Peppers and Mancheg…
How to Make Sesame Cookies | Buddy Valastro
How to Make Apple-Cider Braised Pork Chop Sandwiches with Onion …
Rach's Chef Pals Say Goodbye to Show in Surprise Video Message
Celebrity Guests Send Farewell Messages After 17 Seasons of the …
Andrew McCarthy Teases Upcoming "Brat Pack" Reunion Special
How to Make Spanakopipasta | Rachael Ray
Michelle Obama Toasts Rach's 17 Years on the Air With a Heartfel…
How to Make Shrimp Burgers | Jacques Pepin
Andrew McCarthy Chokes Up Discussing Emotional Trip to Spain wit…
Celebrity Guests Send Farewell Messages After 17 Seasons of the …
RELATED: How to DIY This Expensive-Looking Blush Ombre Floating Shelf Wall For Only $50!
Step 3: Give a room some texture with this DIY upholstery project — using an old sweater
“I like to bring in texture wherever I can into a design — so a little fur, or a little fluff,” Charlotte says. And what’s fluffier than a cozy sweater?
Charlotte’s ace tip: By carefully cutting out the seams of an old sweater, you’re left with a soft and pliant material that’s perfect for reupholstering a stool or chair, in your bathroom or whatever room you’re working on in the house!
“The trick is you want to pull it pretty tight — you don’t want bunches and wrinkles,” Charlotte says. Also, don’t be stingy with the upholstery staples. “Because I’m working with a sweater, I’m going to use more staples than I normally would,” Charlotte says. She recommends stapling all around the edges and in the middle where the extra fabric is gathered as well.
Watch her pull it off in the video below!
How to Use An Old Sweater to Reupholster a Chair

How to Use An Old Sweater to Reupholster a Chair
Q&A with Organizational Pro Peter Walsh + Dermatologist Shares A…
Actor Hank Azaria + Freezer Meals + Artichokes 2 Ways with Rach
See Inside Barbara Corcoran's Stunning NY Apartment + It's Steak…
The Best Moments From 17 Seasons of the Show Will Make You Laugh…
How to Make Chicken and Lobster Piccata | Richard Blais
Donnie Wahlberg Spills Details About NKOTB's First Ever Conventi…
Donnie Wahlberg + Jenny McCarthy Say Rach Is Such a "Joy" + Look…
How to Make Crabby Carbonara | Rachael Ray
Rach Chats "Firsts" In Flashback From Our First Episode Ever In …
How to Make Tortilla with Potatoes, Piquillo Peppers and Mancheg…
How to Make Sesame Cookies | Buddy Valastro
How to Make Apple-Cider Braised Pork Chop Sandwiches with Onion …
Rach's Chef Pals Say Goodbye to Show in Surprise Video Message
Celebrity Guests Send Farewell Messages After 17 Seasons of the …
Andrew McCarthy Teases Upcoming "Brat Pack" Reunion Special
How to Make Spanakopipasta | Rachael Ray
Michelle Obama Toasts Rach's 17 Years on the Air With a Heartfel…
How to Make Shrimp Burgers | Jacques Pepin
Andrew McCarthy Chokes Up Discussing Emotional Trip to Spain wit…
Celebrity Guests Send Farewell Messages After 17 Seasons of the …
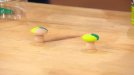
Step 4: Update any hardware in the room with this clever DIY paint project
Whether in the bathroom, elsewhere in the house, even on a piece of furniture, knobs can look grubby and dated. Replacing them can also be expensive! But Charlotte has an easy DIY project that gives a graphic makeover to the most basic wooden knobs (she picked hers up for $1 each at the hardware store).
All you need is blue painter’s tape, a small paint brush and a few different colors of paint that pick up on the color palate of the room. With Charlotte by her side, Rach even gives it a shot, and loved the effect!
“I’m so DIY challenged, but Charlotte makes me feel like there’s hope for people like me!” she says. Watch the video above to see how these cool, graphic knobs are made.
Watch Rach give it a go in the video below!
Update Any Furniture Hardware With This Clever DIY Paint Project
Update Any Furniture Hardware With This Clever DIY Paint Project
Q&A with Organizational Pro Peter Walsh + Dermatologist Shares A…
Actor Hank Azaria + Freezer Meals + Artichokes 2 Ways with Rach
See Inside Barbara Corcoran's Stunning NY Apartment + It's Steak…
The Best Moments From 17 Seasons of the Show Will Make You Laugh…
How to Make Chicken and Lobster Piccata | Richard Blais
Donnie Wahlberg Spills Details About NKOTB's First Ever Conventi…
Donnie Wahlberg + Jenny McCarthy Say Rach Is Such a "Joy" + Look…
How to Make Crabby Carbonara | Rachael Ray
Rach Chats "Firsts" In Flashback From Our First Episode Ever In …
How to Make Tortilla with Potatoes, Piquillo Peppers and Mancheg…
How to Make Sesame Cookies | Buddy Valastro
How to Make Apple-Cider Braised Pork Chop Sandwiches with Onion …
Rach's Chef Pals Say Goodbye to Show in Surprise Video Message
Celebrity Guests Send Farewell Messages After 17 Seasons of the …
Andrew McCarthy Teases Upcoming "Brat Pack" Reunion Special
How to Make Spanakopipasta | Rachael Ray
Michelle Obama Toasts Rach's 17 Years on the Air With a Heartfel…
How to Make Shrimp Burgers | Jacques Pepin
Andrew McCarthy Chokes Up Discussing Emotional Trip to Spain wit…