


Woodworking Basics | HGTV Star Chip Wade

Q&A with Organizational Pro Peter Walsh + Dermatologist Shares A…

Actor Hank Azaria + Freezer Meals + Artichokes 2 Ways with Rach

See Inside Barbara Corcoran's Stunning NY Apartment + It's Steak…

How to Make Chicken and Lobster Piccata | Richard Blais

Donnie Wahlberg Spills Details About NKOTB's First Ever Conventi…

Donnie Wahlberg + Jenny McCarthy Say Rach Is Such a "Joy" + Look…

The Best Moments From 17 Seasons of the Show Will Make You Laugh…

How to Make Crabby Carbonara | Rachael Ray
Rach Chats "Firsts" In Flashback From Our First Episode Ever In …

How to Make Apple-Cider Braised Pork Chop Sandwiches with Onion …

Rach's Chef Pals Say Goodbye to Show in Surprise Video Message

How to Make Sesame Cookies | Buddy Valastro

How to Make Tortilla with Potatoes, Piquillo Peppers and Mancheg…

How to Make Shrimp Burgers | Jacques Pepin
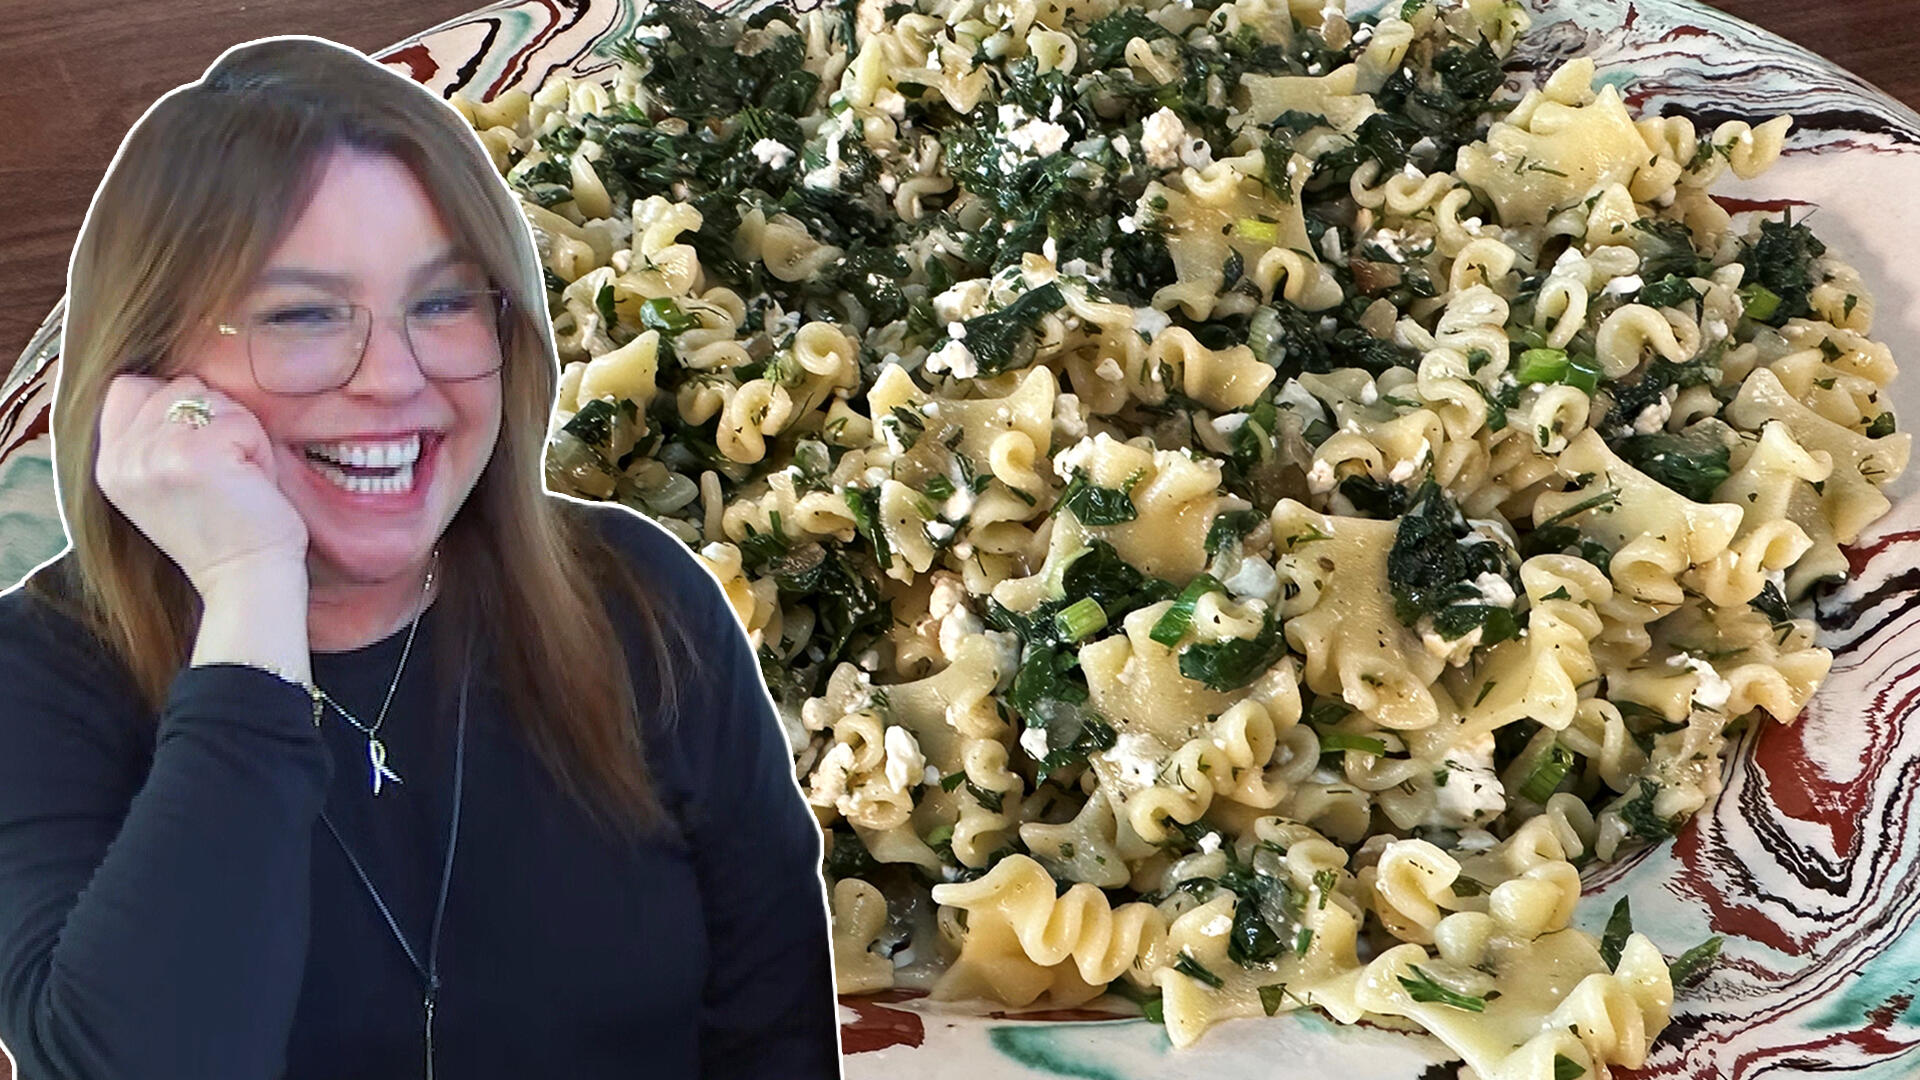
How to Make Spanakopipasta | Rachael Ray

Andrew McCarthy Chokes Up Discussing Emotional Trip to Spain wit…

Celebrity Guests Send Farewell Messages After 17 Seasons of the …

Celebrity Guests Send Farewell Messages After 17 Seasons of the …

Andrew McCarthy Teases Upcoming "Brat Pack" Reunion Special

Michelle Obama Toasts Rach's 17 Years on the Air With a Heartfel…
Whether you never took a woodshop class or didn't pay a whole lot of attention in yours, you're in luck. Shop teacher from William E. Grady Career and Technical High School in Brooklyn, New York, Jose Santiago (a.k.a. Mr. Santiago) and HGTV veteran, Chip Wade, are teaching a refresher course.
From the right way to sand wood to the best type of hammer for beginners and more, the woodworking pros are breaking down the basics.
Watch them make serving trays with Rach in the video above, and read up on the basics below before you take on your next DIY project.
1. SAFETY COMES FIRST
Always, always put on safety goggles before starting your woodworking project, our pros advise.
"You want to be safe and you want to be comfortable," Chip says.
Plus, "you're going to do your best work when you're not having to strain and reach for things," he continues — so set up your workstation wisely.
2. THE RIGHT WAY TO SAND WOOD
First off, Chip says that the best woods to use — for beginners, especially — are poplar and white oak.
To sand, you can use a sanding sponge (Chip's favorite) or a sanding block, which is simply sandpaper over an ergonomic handle. Either way, the most important thing is that you have a flat hard edge to sand with.
While sanding, you're going to want to do so WITH — or ALONG — the grain, Mr. Santiago and Chip explain.
See what they mean?
That's because if you scratch the wood against the grain, the imperfections will show when you stain it.
3. USING A HAMMER CORRECTLY
One of the keys to nailing a nail properly is choosing the right hammer.
Chip recommends a 16-ounce curved claw hammer. "Anything more than this is just too heavy," the HGTV veteran says.
"I also recommend if you're going to get your first hammer," he continues, "get a smooth face, not a waffle face that looks like an ice cream cone." (Waffle face hammers are typically used to help grab picture-framing nails.)
Then, hold your hammer more towards the end, where there's a lip. Swing it loosely, Chip suggests, and get your wrist into it.
"I liken it to snow skiing," he explains. "If you're very timid when you're snow skiing, you're not going to be very good at it. If you're timid with your hammer, you're not going to be very good at it. You have to be confident."
And "focus on the nail head," Chip advises, "not the hammer."
4. HOW TO NAIL A NAIL WITHOUT HURTING YOURSELF
As for nailing, a very common mistake when starting a nail is to hold it down near the bottom, against the wood. This is wrong, because if you miss the head of the nail (and this might happen, especially if you're a beginner), the hammerhead will very likely crush your fingers against the wood. (Ouch!)
By holding the nail near the top, Chip explains, you have a bit more leeway and are less likely to hurt your fingers when mishaps occur. (Regardless, always be careful!)
Watch how Chip does it:
RELATED: How To Hang Wall Art Without Nails Or a Hammer
5. THE ART OF APPLYING A PROTECTIVE COATING
"Any good woodworking project has to have a protective coating," Chip says. It could be paint, but in the case of their serving tray, Chip and Mr. Santiago used a wood stain.
They stained their trays with a cloth — because when you paint it on, it floods the wood, making the wood grain rise.
"[The cloth] allows us to control the amount that's going on there," the HGTV star explains.
So put gloves on, apply stain to our cloth — and wax on, wax off! (Wax off means wiping off the excess stain.)
Then, finish your project off with a polyurethane sealant OR a food-safe sealant if you're making a kitchen tool, like a serving tray.